First of all, to clear up an issue from the previous post. I soaked my flaky kiln shelf and used a steel wire scrubber to remove the flaky batt wash and it worked like a dream! I thinned my batt wash with water to the consistency of skimmed milk and reapplied a thin layer and left it to dry. My kiln shelves look as good as new!
And now to single firing. I had used this technique when I made a birdbath as I was tight on time. The Mayco glazes are pretty steady with no movement at all. They also give a pretty good colour and coverage with just two thin coats. I glazed greenware and single fired the birdbath and it came out great. However I didn’t know how this technique would work with Amaco glazes.
I did a lot of throwing last weekend knowing that I wanted to use my Amaco glazes. However when I looked at my pyrometric bars, I saw I only had one or two bisque temp bars left! My little Olympic Kiln is old skool with a manual ramp dial and kiln sitter. So with precious bisque bars in short supply I thought about single firing my thrown mugs and bowls.
Amaco Potter’s Choice glazes mix and move and create beautiful effects but in order to do so, you need to apply 2, 3 even 4 coats depending on the thickness. I let my pieces dry to leather-hard and applied two coats of Toasted Sage then two coats of Indigo Float and two of Seaweed on alternate pieces. With all the glaze on they took a long time to dry but I was patient. I didn’t want to add too much because I didn’t want them running and ruining my lovely new clean kiln shelves.
I managed to pack the kiln with 3 layers and get everything in! And as I was doing a single firing I did a really slow low heat before raising the temp after an hour or two.
I fired to cone 5 and it took longer than expected to get to temperature, but it did get there in the end! I left the kiln to cool and opened up the lid holding my breath..
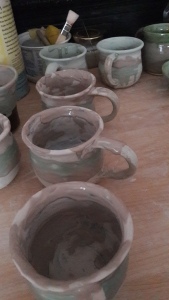
..Everything was in one piece! fantastic. But the glaze? ..it looked dull and thin. Not like Amaco at all and obviously not the effect I was hoping for!
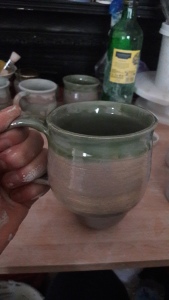
The only ones that looked decent were the two pots I used the tenmoku on first. I was hoping the Toasted Sage would be a little lighter than the grey but then again I hadn’t done a test tile and trying to guess colours from the Internet isn’t a good idea.
I admit I was a little disappointed but it’s all part of the learning process! I think overall I was happy that my single firing worked, it was just a lack of experience with Amaco glazes that meant I didn’t add enough layers.
I am confident that should I want to single fire again I could achieve results close to what I wanted.
I spent this morning re-glazing my mugs and bowls for a second firing! At least it won’t need such a long slow ramp as the mugs ceramic now but I still don’t want to rush and risk an exploding kiln! I added more layers of each glaze but also more stripes of Indigo Float and Seaweed. The colours look great when they interact so hopefully this will achieve that effect.
 Once they’re dry I will fire them again, sometime early this week if not tomorrow and post the final results!
I guess I’m must also admit that I’m keen to get single firing experience as it saves a lot on the electricity bill!! And if it produces the effect you want, then why not single fire? My only advice is to make sure your pieces are dry as a bone before firing and then allowing a long slow ramp. I was advised to leave extra clay clean from glaze to allow gas to escape from ghee clay body, but I just left the bottoms clean as usual and this was fine.
Happy potting!
PS xx


